Starter wire broken at splice
If the starter on a CX will not work with the starter button but does run by jumping the starter solenoid perhaps there is a broken wire in the wiring harness. Here is a write up forum member MurrayF did. These splices can break from just being flexed over the 30 plus years of the life of the motorcycle. Also, the solder joint causes a stiff ridged point. Directly after the solder joint is where the wire breaks. The write up below is how to find the broken wire splice and how to repair it.
The majority of the information was taken from this forum post. http://cx500forum.com/forum/technical-help-forum/17671-removed-fork-now-no-power.html
If with the key on and starter button held in, the starter runs if the clutch is pulled in all the way or the starter runs if you hold the steering all the way over to the left, there may be a broken wire in the wiring harness.
How to find the factory splices that break.
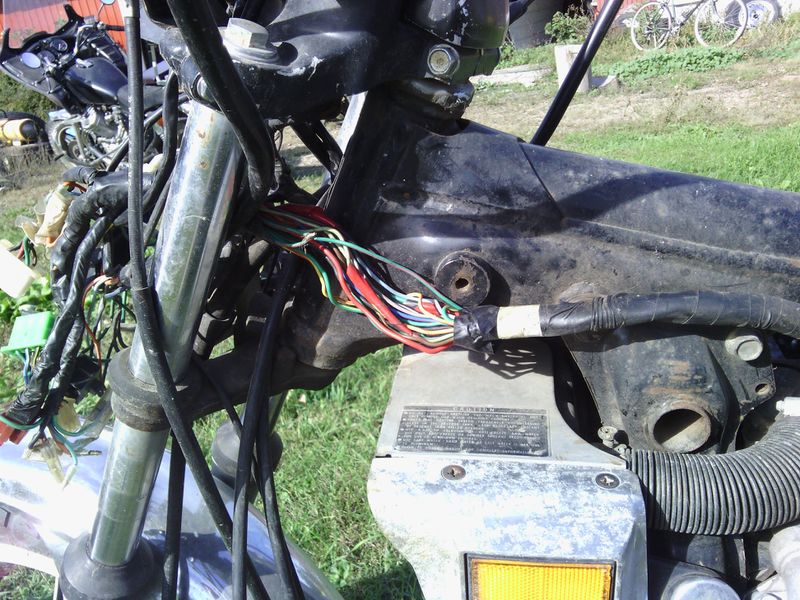
"If you feel on the harness coming off the chassis on the bike from under the gas tank forward there is a spot that is rubber covered. Then as it moves towards the forks, it changes to tape only. The joint is in this area."
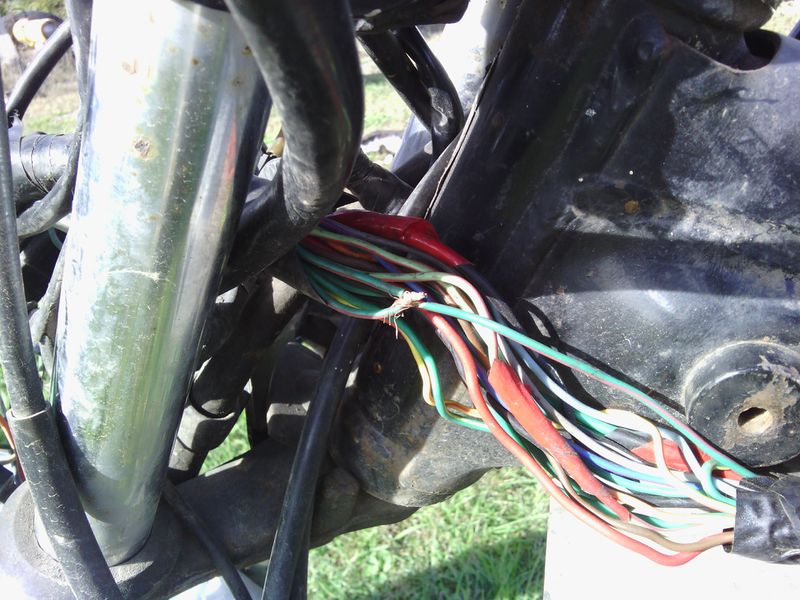
In the picture below, the offending splice can be seen with the green/red wire just in front of the head tube.
"I usually cut into the first inch of the rubber covering and work my way forward through the tape and remove all the tape till the harness starts to branch off. There are 2 factory soldered 3 way splice joints in this section wrapped in either red or yellow tape. Redo them both. The green with red tracer is the starter solenoid circuit. If the wire from the back side (single wire out of the 3 that goes into the harness towards the rear of the bike is broken) then the bike won't crank at all. If the wire from the right side of the splice going forward and up is broken then the bike won't crank in neutral but only when the clutch is pulled in."
Here are a few pictures of the wiring harness being repaired. This is not a soldering how to, so how to solder is not shown.
[Here's one of the many links on YouTube on soldering]
Here is the broken splice along with the wire that will be used to move the splice to a location that does not flex every time the handlebars are turned.
Also in this picture, the lite green/red wire, that is mentioned above, has a splice that should be repaired in the same manner.
800x600px
"I like to cut the joint back and solder in a new 4 inch piece of wire that is soft and flexible then heat shrink all the joints and re-tape the harness."
The picture below shows the green/red wires having been cut back re-stripped and twisted together along with the replacement wire. This joint will need to be soldered and covered with heat shrink tubing.
[Here's one of the many links on YouTube on soldering]
Here is the wiring harness all repaired and re-wrapped with electrical tape.
This site is backed by Number 85, who provide the hosting. If you need a website done, get in touch with them.


