Carb Removal
One of the most common service procedures is to remove the carbs from our bikes. Whether for cleaning, adjusting, or replacing parts, the process can seem daunting to the first timer. With a few tips and tricks, this process will become much easier and while not always "fun" at least not terrifying. Since the layout is slightly different on different models, we will do a general explanation that can be applied to all models. The CX models are the easiest, the GL500's are next and the GL650's may be the most difficult due to space constraints. With a bit of experience, you should be able to remove the carbs in approximately 20 minutes. I suspect that Larry, our carb guru can do it in less than 10 minutes, but he has done hundreds.
The first step is to remove the seat, and fuel tank. The seat is usually held on by two bolts, one on either side. The tank can be held by a rear bolt, plus 2 front side bolts, or the front slipping into slots under the tank. Make sure to remove the fuel line before lifting off the tank. Set both the tank and seat out of harms way. I like to drain the carbs before removing them, as it is less messy. So open the drain screws at the bottom of the float bowl and allow the fuel to drain into a container. Now examine the brackets and hoses around the carbs. On the CX models it is much easier to remove the coil mounting bolts and connectors and allow the coils to pivot up and out of the way. Tighten up the front bolt to hold it. The GL's have a crankcase vent hose routed thru the carbs, remove it completely. Remove any other hoses or braces that will hinder the carbs moving. Pull off the drain hoses from the float bowl and leave them lay.
Now that you have some clearance, I like to loosen all the clamps from the airbox boots and the intake insulators. Then, using a 8 mm wrench, remove the bolts that hold the intake runners (insulators) to the head. Now reach in and rotate the runners about 90 degrees. This will provide a gap between the head and the intake flange. Now, using a large screwdriver, slip it between the carb body and the bottom of the rubber insulator and pry off the insulator from the carb venturi. There is a deep groove in the rubber that fits a ridge on the carb, so this can become difficult. Warming up the rubber with a heat gun may help to soften the rubber. Even some silicone or WD40 spray may help lube the area.
With the front intake runners off, pull the carb assembly forward. Now working from the LEFT side of the bike, slither the carb bodies and attached cables out towards you. You may have to open a cable retainer on the frame to allow for the carbs to move out to the area of the valve cover. Then using a 10 mm wrench undo the lock nut on the throttle cables. Rotate the throttle with the handlebar grip and hold it in that position with your fingers at the carbs. Then slip the connector out of the fittings. Once one is done the other is easier. If you haven't removed the choke cable, do that too. Now the carbs should easily come out.
by Blue Fox
And now a pictorial on installing carbs by Larry:
Originally created by LRCXed Larry.
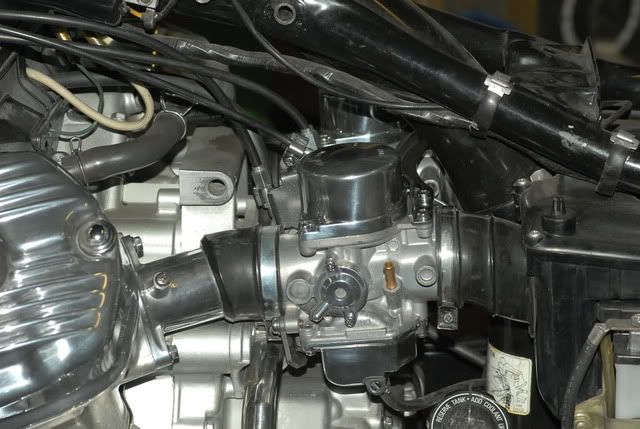
As I promised someone the other day, Here is a step by step of replacing or removing your carbs from a CX500 S, D, or C. I'm showing the steps I take while installing a set. To remove them, just reverse the steps and start from the bottom up. Sorry the pictures are so dark. I didn't want to take the lights off my photo booth because I'm still working on the book. I'm installing a set of 78-79 STD. carbs here that I'm getting ready to balance and test run.
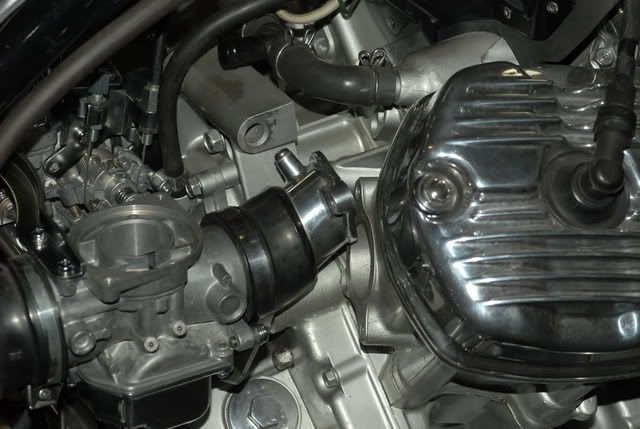
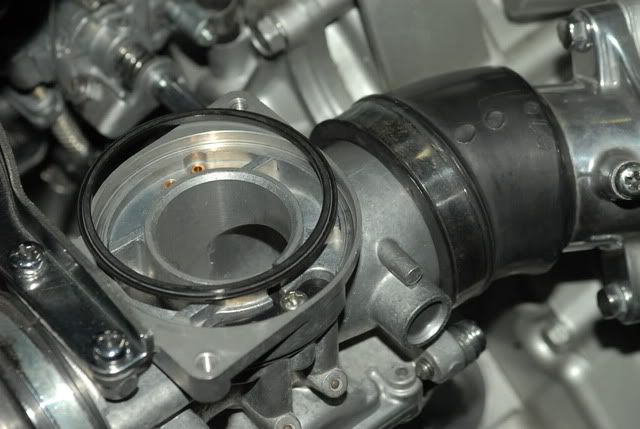
I don't think I need to tell you to remove the tank. In the second picture you should notice that the upper engine mounts are removed. This makes it a little easier to get the carbs in or out. And it's much easier to reach the balance adjustment screw when it's time to adjust the balance between them. OK, the carbs are rebuilt and or ready to go. You have the new O-ring seals in the intake manifolds and your ready to install the set. The first thing you want to do is to remove the right side cover and piston slider plus the plastic O-ring under it. Then with the carbs out on the side of the motor, install your throttle cables and choke cable. You can adjust them from this point also. No need to try and reach inside after they are installed.
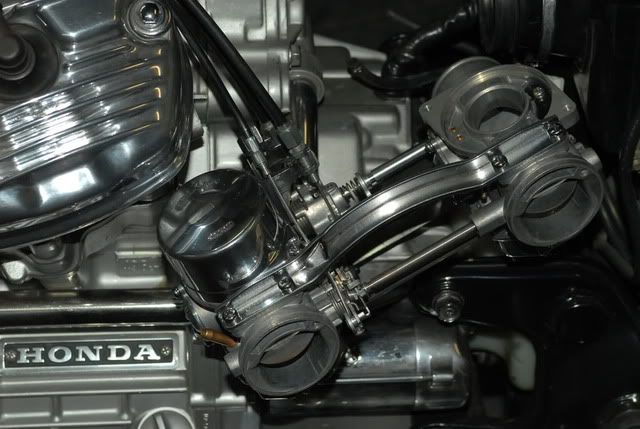
After they are adjusted with about 1/8" to 1/4" throttle free play, tighten down the lock nuts on each cable. Now turn the carbs with the top twisted to the front of the motor and gently work them in between the motor and the frame tube. You might need to move the wire harness a bit, but when positioned properly, they go in smoothly.
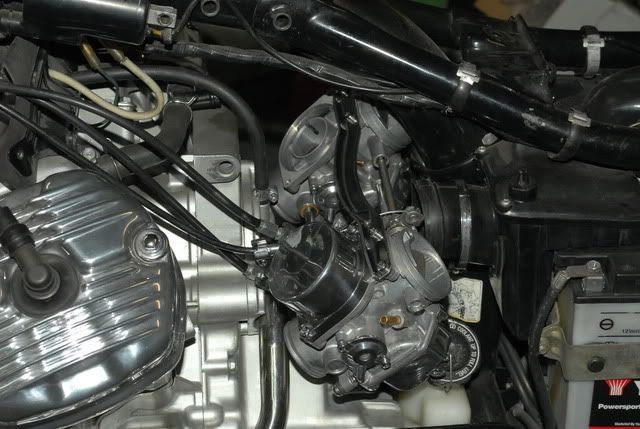
After they are in position, work them up into the air filter connections and clamp them lightly into position. Twist the throttle a few times to make sure your cables are not binding. Turn the bars all the way to the right to test this also. They seem to bind if they are not laid out right when the bike is turned to the right. The cables need to lay smoothly and not be twisted around each other, or have sharp bends in them. If it binds this is the perfect time to back out and reposition all your cables.

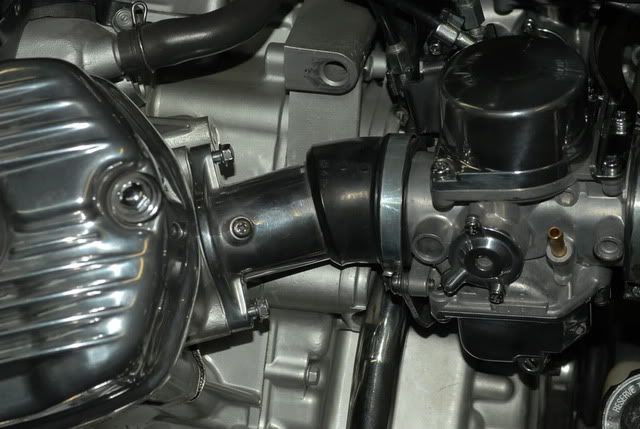
Next make sure the O-rings are installed in the end of the manifold, clamp installed very loosely on the rubber side, and with it rotated upwards, push the manifold onto the end of the carb. I wet the inner lip a bit with some spit. I know, but it helps when these things are so tight to push on.
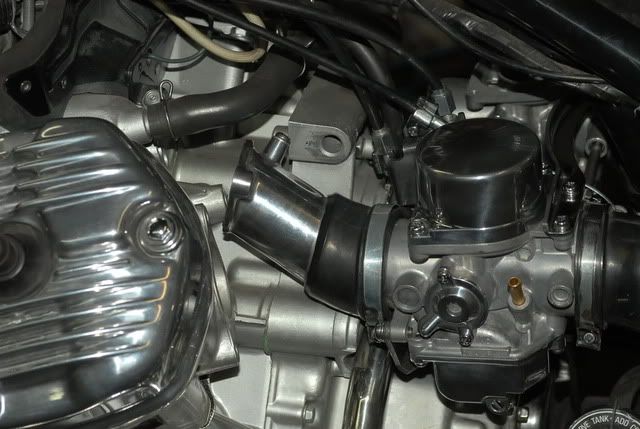
Now rotate the manifold back down into position and insert both bolts loosely to hold it in position. Please ensure the O-ring is still in it spot and has not fallen out. I have had this happen before, and found it laying on the floor after I thought it was done. You could use contact adhesive in a few spots to hold it in too.
Repeat the process on the right side same as the left. This side will be a little harder to get in because the left side is some what secured and the carb is not moving around as much. I guess you could put both on before you add the bolts if you wanted to.But when I do it this way, I know the O-ring is secured on the other side and wont fall out.
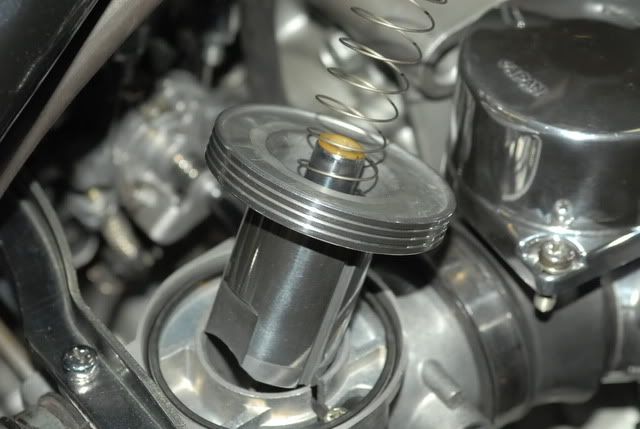
Now you can tighten up the intake manifold bolts, and all for clamps on the rubbers so they are secure and sealed. Make sure the air box fittings are lipped all the way around the intake side of the carb. They are a little hard to see some times. Use a flash light. Install the plastic ring in the top of the carb, LIP FACES UP.
Then the piston and spring, be careful to align the slot up with the plastic guide, and be gentle with the slide needle. It should slide in easy.
Secure the cover with it's 2 screws and attach the float bowl drain hoses.
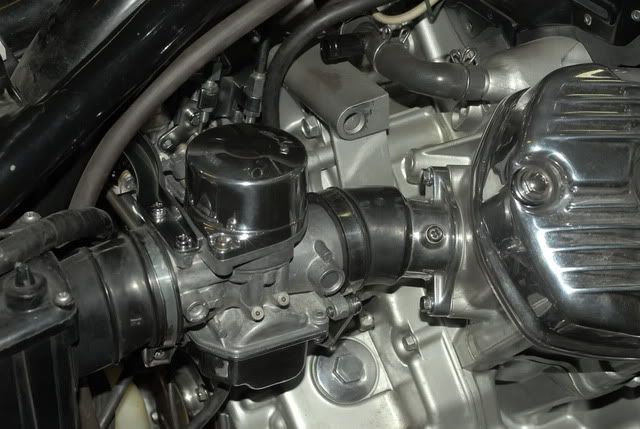
That's all there is to it. Even with doing the pictures at the same time it still only took me about 35 minutes. You should be able to install a set in about 15 to 20 minutes tops. They key here is to have every thing laid out and ready as you start your work.
At this point I don't need to go into how to put on your tank and the fuel line. I will tell you though that you should always use a fuel filter of some kind. It saves a lot of frustrations when you all of a sudden end up with one side not idling or adjusting right because you allowed dirt and debris to get into a clean carb. If your carbs are not balanced yet, then this is the time to do it. Add an external tank with filter on it and do the balancing before you put on the tank. Good luck, and I hope this helps those that have never done it before. Larry
This site is backed by Number 85, who provide the hosting. If you need a website done, get in touch with them.
