Shifter seal replacement
Here is a way to stop that annoying oil drip at the shifter seal.
Shifter Oil Seal Replacement
by Blindstitch2002 » Thu Jun 10, 2010 6:44 am
It's a $4 and 15 minute job so why not stop that drip.
Also some say you don't need to drain the oil but I prefer to do all my maintenance at one time at one time so that means oil change and tappet and cam chain adjustment too.
1. Drain the oil, (you will only lose a couple of drops if you don't drain the oil).
2. Remove the shifter lever clamp bolt and (taking note of lever height)slide shifter lever off of shaft. (Also, towards the end of this article, there are pictures of witness marks (small punch marks) that are to be ligned up.)
3. Pry out old seal with screwdriver or hooked scribe, being careful not to scratch or damage the shaft or the engine housing.
4. Cover shaft splines with tape to prevent damage to new seal.
5. Oil new seal, and face the side of the seal with the spring towards the engine. (Lettering to the outside)
6. Slide over shaft and press squarely into housing. My seal pressed in with only hand pressure, but you can use a deep well socket and give it a little tap if it's stubborn. Just make sure that it's going in straight!
7. Reinstall lever and bolt. Pay close attention to the height of the lever when you put it back on, and follow your shop manual's torque spec for the pinch bolt. (You have a manual, right!?) Factory Service Manual download
8. While you've got the oil out, go ahead and replace the oil filter (noting order of washer and spring) and drop in some new oil. You're done! All about oil and changing it.
Here is a pictorial that Blindstitch posted on the procedure:
It seems like one of the simplest things that everyone seems to ask about when there bike is leaking is how to fix the shifter oil seal.
So here's how to do it.
First you need some tools.
A ratchet with 10mm socket, larger 1/2 drive socket the size of the oil seal, and a long thin blade screwdriver.
You don't need to drain the oil to do this fix.
Resized to 43% (was 1023 x 682) - Click image to enlarge 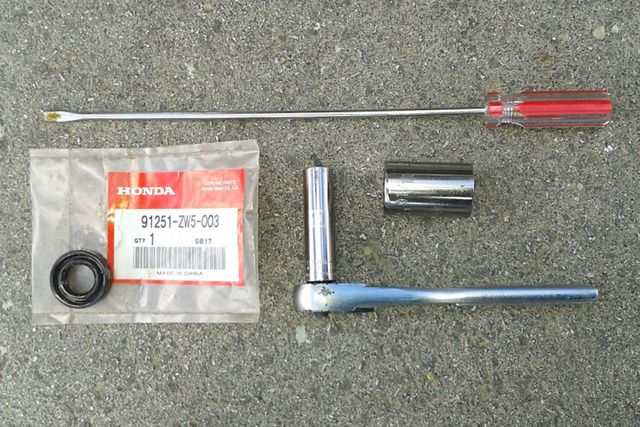
Ok so to the bike. Remove the shifter lever.
Resized to 43% (was 1023 x 682) - Click image to enlarge 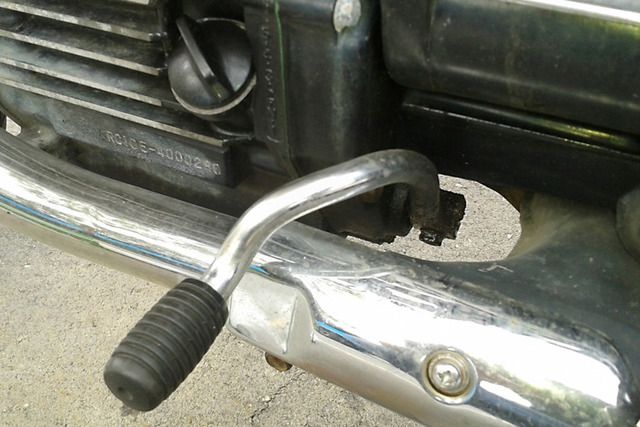
With the lever removed you can see the seal.
Resized to 43% (was 1023 x 682) - Click image to enlarge 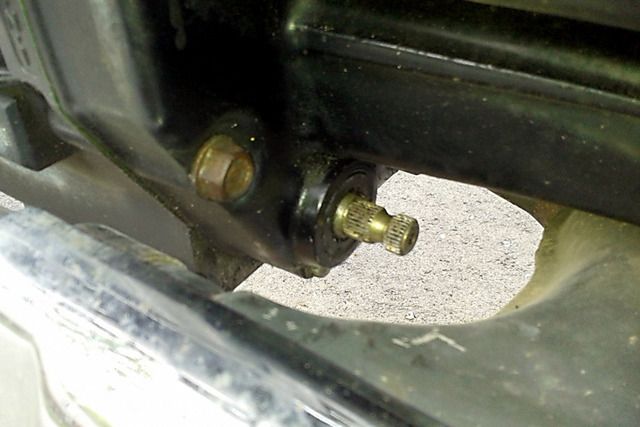
Then take the flathead screwdriver and slide it between the seal and the shifter lever. It doesn't have to go deep. Just an 1/8th or so. Some suggest to cover the shifter shaft with tape but it isn't needed. Lightly pry back on the screwdriver and the seal will come out easy.
Resized to 43% (was 1023 x 682) - Click image to enlarge 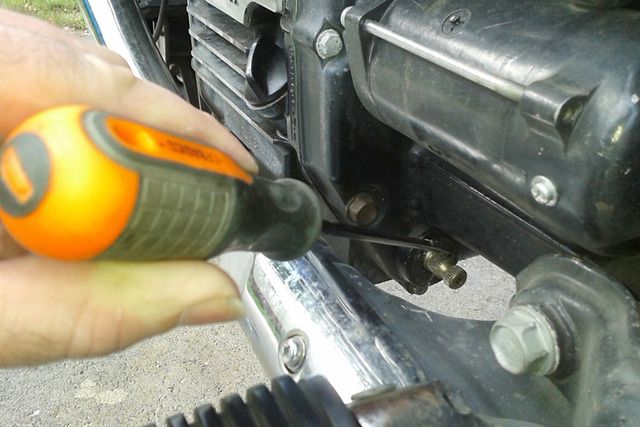
Resized to 43% (was 1023 x 682) - Click image to enlarge 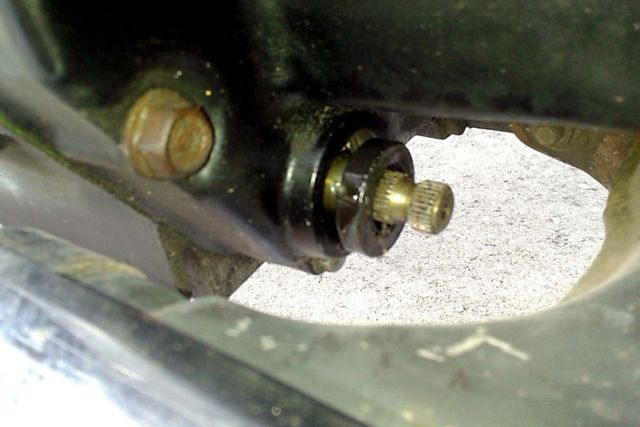
Here is the replacement seal. The top one is the used one.
Resized to 43% (was 1023 x 682) - Click image to enlarge 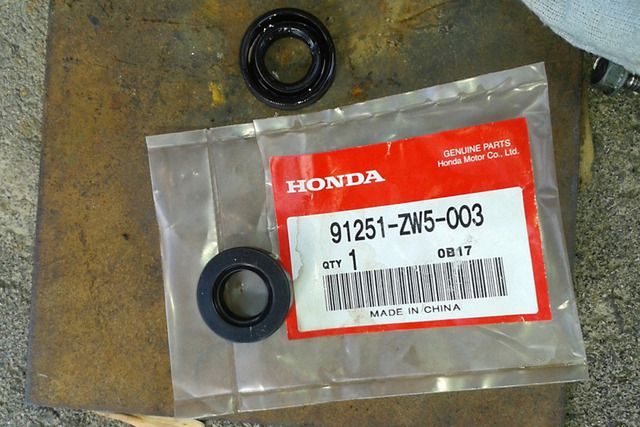
Then I smear a bit of oil on the seal for lubrication when pushing it back into the hole. Put the seal on the shifter shaft and place the large socket on behind it.
Resized to 43% (was 1023 x 682) - Click image to enlarge 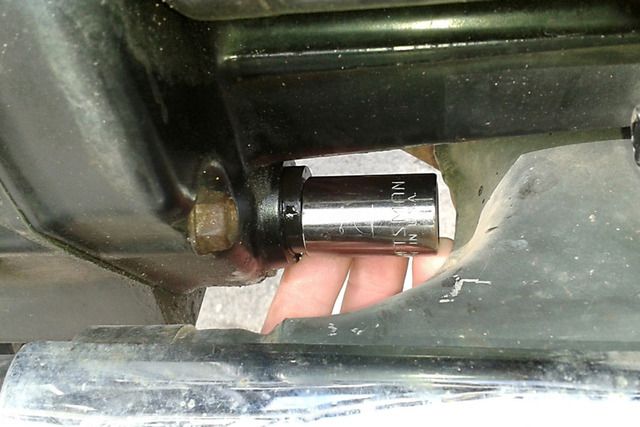
Then use the screwdriver or other type of pry bar or lever to push the socket forward into place.
Resized to 43% (was 1023 x 682) - Click image to enlarge 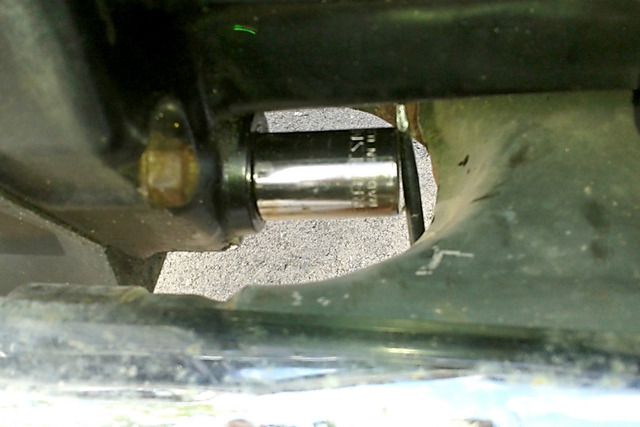
Once that's on it's time to put the shifter back on. One thing people tend to forget is that when assembling bikes on an assembly line there are always ways to make the finished product go together without test fitting or jigs. The Shifter lever has a alignment dot on it to get it into spot.
Resized to 43% (was 1023 x 682) - Click image to enlarge 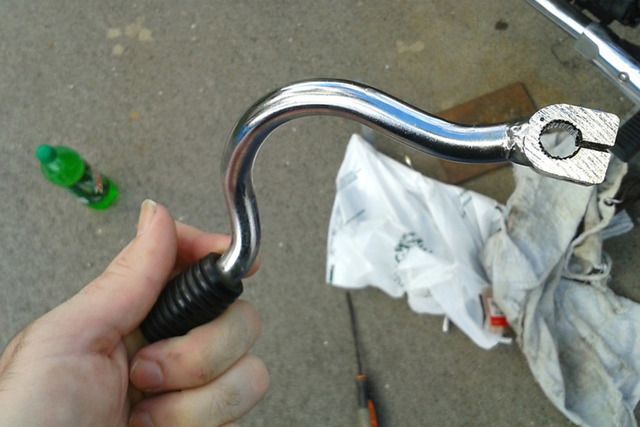
Resized to 43% (was 1023 x 682) - Click image to enlarge 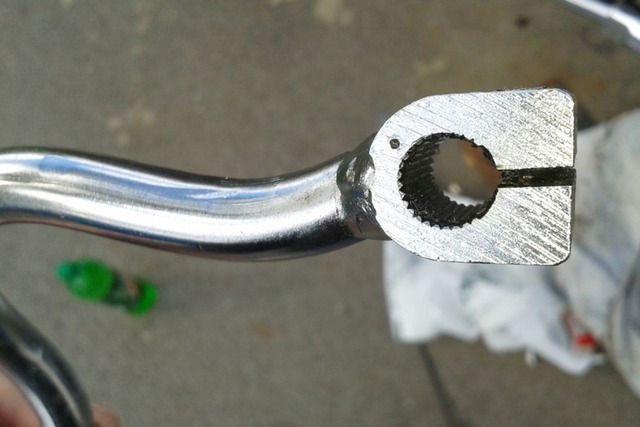
The shifter shaft also has a dot on it. Just align the two and put the bolt back in and you should be ready to go. Although this should work sometimes shifter levers get bent so moving up or down a tooth may be required. And when back together always dry shift the test fit before taking off. Once good go out and ride.
Resized to 43% (was 1023 x 682) - Click image to enlarge 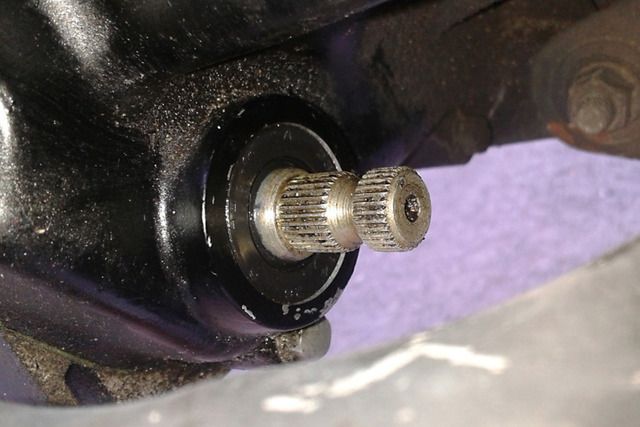
This site is backed by Number 85, who provide the hosting. If you need a website done, get in touch with them.
