Turbo Triple Bypass
Overview
So, what is a Triple Bypass? This term has been attached the CX family for quite some time. The stator and chain can only be performed with the engine removed. There are three elements -
- Stator replacement - This is clockwork event every 20k if not sooner.
- Water pump seal - The Achilles heal of the CX family.
- Timing chain and guide replacement. Average is 40k, but can be less.
The Turbo variants are similar to the NA siblings regarding a triple bypass - but there are enough very important differences to warrant their own article.
Getting Started
OK, you have your bike and an agenda. Now you need a plan. Engine comes out. But where to start? Begin by reading through the FSM on engine removal. Its actually pretty good and much better than I imagined it would be.
Now, Go clear some space for your parts. If you think stacking them in that 2 sq. ft. unused corner of the garage is going to work - forget it. Make some shelves, even if temporary. Go high in the garage if you have to. The trunk of an unused car is perfect! Use a section in your basement. You cannot afford to have something tip over and damage your fairing, rip your seat, or punch a hole in your radiator. This is called storage rash. And its going to happen if you don't keep your work area tidy and your parts kept up and out of the way until you need them. If you have a dedicated shop just for this project that will not be taken over by another project before its done - you are lucky. It ensures the integrity of the sight. Its no different than an operating room for a surgeon. Treat your bike like a patient and you will be well on your way to a successful triple bypass.
Go buy some freezer bags. You will need qt size and gallon size. Use a permanent marker to label and number the bags as you go. Use thumb tacks to secure the bags in order to a shelf or high wall. This will allow you to -
- See all your parts visually through the bags - no more pawing through boxes or containers looking for something.
- Organize. Nothing gets lost or broken. I did a complete frame up on a turbo and completed it without losing or damaging a single part.
- Reassembly! Work your bags in the reverse order and job just flows. Once you use this method, you will never go back to your old methods.
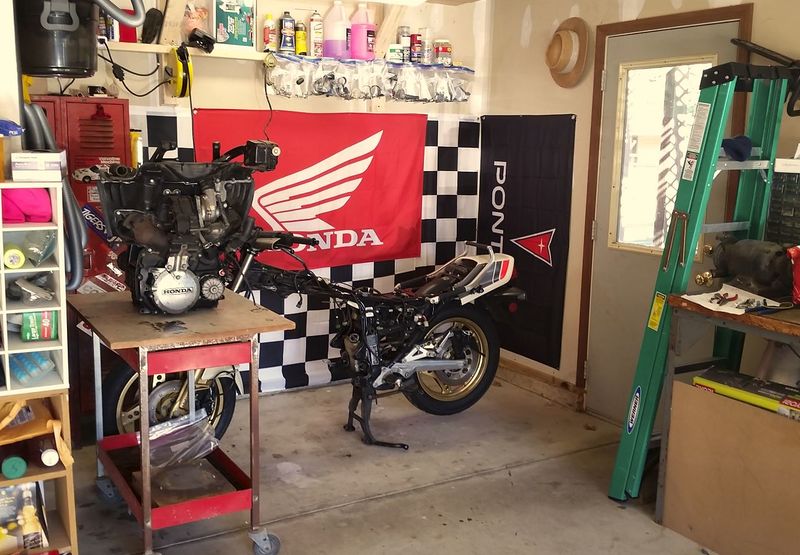
You will need a nice flat surface to work the engine on. No fancy stand required. I used an old roll cart with a leftover counter top mounted to it. This not only allowed me to move it out of the way while working on the bike, but I could store it when the project wasn't being actively worked. Need better light? wheel it to the door! Need to blow off some debris? Wheel it to the compressor! You will find it makes the job really much easier and manageable in a tight space.
Teardown
Start taking pictures of your bike. Multiple angles. You will capture things you never thought were important when you start trying to figure out routings 3 months from now. Every part - take more pictures. No excuse not to. They can be deleted later after the project. You will not find the level of detail in those photos in the FSM - and your memory will fail you. Take the time and discipline. Your results will be a perfect job.
Part Info
Build Up
Finishing Up
Notes
This site is backed by Number 85, who provide the hosting. If you need a website done, get in touch with them.

